Introduction to Coalesce.io: Transforming Data Integration
In today's data-driven world, organizations face the challenge of integrating and managing vast amounts of data from diverse sources. Traditional methods of data integration often involve complex processes, high costs, and significant time investments. Enter Coalesce.io—a groundbreaking platform designed to streamline and simplify data integration like never before.
What is Coalesce.io?
Coalesce.io is an innovative data integration platform that empowers businesses to consolidate their data from various sources into a unified, accessible format. With its user-friendly interface and advanced features, Coalesce.io enables organizations to efficiently manage, transform, and analyze their data, driving more informed decision-making and operational efficiency.
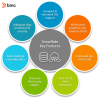
Key Features of Coalesce.io
1.Unified Data Integration: Coalesce.io seamlessly integrates data from multiple sources, including databases, cloud services, APIs, and more, into a single cohesive dataset. This eliminates data silos and ensures a comprehensive view of your information.
2. Intuitive Interface: Designed with usability in mind, Coalesce.io offers an intuitive drag-and-drop interface, making it accessible to users of all technical levels. Whether you're a data scientist, analyst, or business user, you can easily navigate and leverage the platform's capabilities.
3. Advanced Data Transformation: Coalesce.io provides powerful data transformation tools, allowing users to clean, enrich, and manipulate data to meet their specific needs. From simple data cleansing to complex transformations, the platform handles it all with ease.
4. Scalability and Performance: Built to handle large-scale data operations, Coalesce.io ensures high performance and scalability. Whether dealing with small datasets or massive volumes of data, the platform maintains optimal speed and efficiency.
5. Security and Compliance: Data security is a top priority for Coalesce.io. The platform incorporates robust security measures, including encryption, access controls, and compliance with industry standards, ensuring your data is protected at all times.
Benefits of Using Coalesce.io
- Increased Efficiency: By automating data integration processes, Coalesce.io reduces manual effort, saving time and resources.
- Enhanced Data Quality: With comprehensive data transformation tools, you can ensure your data is accurate, consistent, and ready for analysis.
- Improved Decision-Making: Access to integrated, high-quality data empowers your team to make data-driven decisions with confidence.
- Cost Savings: Streamlined data integration and management processes can lead to significant cost savings, allowing you to allocate resources more effectively.
Although starting with Coalesce.io is straightforward. The platform offers detailed documentation, tutorials, and a supportive community to help you every step of the way. Whether you're looking to integrate new data sources, optimize existing workflows, or explore new data insights, Coalesce.io provides the tools and support you need to succeed.
My name is Sanjay Lakhanpal, and in this series of tutorials, I will guide you through every aspect of Coalesce.io. This series is divided into five sections:
1. Getting Started with Coalesce
2. Building Your First Data Pipeline
3. Advanced Data Transformations
4. Collaborating with Your Team
5. Scheduling and Automation
In this tutorial, we will cover the first section: Getting Started with Coalesce. We will explore four key topics:
1. Creating an Account
2. Setting Up Your Project
3. Creating a Workspace
4. Understanding the Interface
Create an Account
This tutorial guides you through the initial setup of your Coalesce.io account, helping you get ready to build and manage data pipelines.
Steps:
- Visit Coalesce.io
Open your web browser and navigate to https://app.coalescesoftware.io/login and click on try for free link.

Sign Up for an Account:
- Enter First Name, Last name, email address, company name and phone number and click submit button.

Email Confirmation
After submitting your information, check your email for a confirmation message from Coalesce.
Login to Your Account
Once coalesce account is setup. Coalesce will send an email containing login details and a link to a coalesce.io app. Click on the link and enter username, password and click sign in.

- Create Project
Once logged in, click on the + sign besides Projects and create new project .

Enter Project name and project description and click next.

On next page enter Git or Bitbucket repository URL and click next.

On next page select git account if already configured. If not configured, click on Add New Account.

Once Add New Account button is clicked, a pop window will appear. Add git information on the add Git account page and click Add Git Account button.

Select newly added Git account and click finish button.

- Create Workspace
Once project is created, on the main page click on create workspace.

Enter the Workspace name and add description to the description field and click on next button.

On the next page, select the branch from the previously configured Git repository from which the code will be cloned. Specify the name of the branch under which development will take place. Click on finish button.

Once the workspace is created, you will see it listed under your project.

- Understand the interface
Click the launch button to enter your workspace.

Once the workspace is open, you will see several options on the left side: Nodes, Subgraph, and Jobs. At the bottom left, there are three icons: the first one provides error information in the workspace, the second is used for interacting with Git repositories, and the last one is a settings button for configuring the workspace.
As depicted in the error icon above, there are two errors present. Clicking on it provides detailed information about the errors present in the workspace.

After clicking on the error icon, it becomes apparent that we need to configure the connection settings for Snowflake and specify a storage location. To adjust these settings, click on the settings icon.

Click the "Create environment" button located in the top right corner. This action will prompt a new page to appear for creating an environment.
Within the create environment page, click on the settings icon. Once the settings page opens, the first step is to establish a connection with Snowflake. Enter the desired environment name, a description, and the necessary Snowflake account details. Finally, click on the save button to complete the process.

Afterward, click on the "User credentials" setting. On the User credentials page, choose the Authentication type. Coalesce supports three types of authentication with Snowflake.
-
- User and Password (Cloud) and User and Password (Browser)
This is a basic authentication. Using Basic Auth is the quickest method to connect your target database platform to Coalesce. Credentials can be stored in either your local browser's storage (not recommended) or in Coalesce's cloud secrets vault.
- Key pair
Coalesce supports Snowflake’s key pair authentication for connecting Development Workspaces and Environments to Snowflake instances. It accommodates both encrypted and unencrypted private keys. Encrypted keys require a corresponding passphrase for use, whereas unencrypted keys can be utilized directly. It's important to note that while Snowflake allows keys to be encrypted with an empty passphrase, Coalesce does not support this and it will result in an error. - Snowflake OAuth
Coalesce offers OAuth authentication integration with Snowflake. Enabling Snowflake OAuth allows users to authenticate their Development credentials via Single Sign-On (SSO) through Snowflake, eliminating the need to directly input a username and password into Coalesce.
- User and Password (Cloud) and User and Password (Browser)
OAuth settings are configured individually for each Environment and Workspace, enabling flexibility with different Snowflake accounts across various environments and workspaces. If your organization utilizes the same Snowflake account and OAuth setup across multiple environments, you will need to manually replicate the configuration for each environment. Workspaces can be duplicated effortlessly, preserving their settings in the process.
In this tutorial, we will use username and password (cloud) authentication. Enter the username, password, role, and warehouse assigned to the user you wish to use for development purposes. Click the "Test connection" button to verify the connection. Once confirmed, click "Save" to apply the settings.

The next step is to set up the storage location. To do this, you must first create a storage location. Return to the workspace settings page, navigate to the storage location settings, and click on "Create storage location."
On a create storage location page give a name for the storage location and click on the create storage location button.
In Coalesce, a Storage Location serves as a logical destination for database objects used as sources and created within the platform. It functions as a container for organizing and managing objects like views and tables. Each Coalesce node, representing a specific database object, is linked to one Storage Location. However, a single Storage Location can accommodate multiple nodes, offering flexibility in data organization.
Essentially, a storage location refers to the schema within the Snowflake database from which data is read or written.

After creating the storage location, revisit the environment settings and click the "Edit environment" button. This will open the environment configuration page once more. Next, navigate to the storage mapping settings. Choose the database from the dropdown menu and select a schema from the Schema dropdown list and click save button.

Once completed, you will notice there are no more error messages in the workspace. Our workspace is now properly configured, and we can proceed to create our first pipeline.
In the next tutorial, we will learn how to create your first pipeline in Coalesce.io.
Subscribe to our newsletter to receive updates on new tutorials